Project Overview - what can it do?
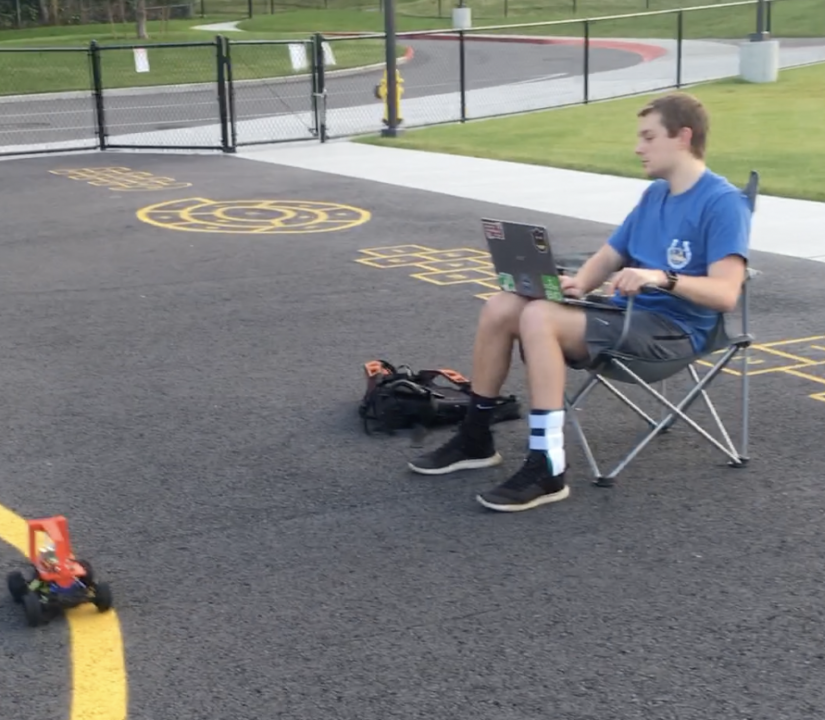
I built my own remote controlled car that could drive itself.
It is a high level self driving library written in Python.
This was built off an open source platform where I was able to collaborate with others world wide.
I was able to drive the car with my phone or laptop and record images, steering angles & throttles.
I took these inputs to train neural net pilots to drive my car in different environments.

How I built it
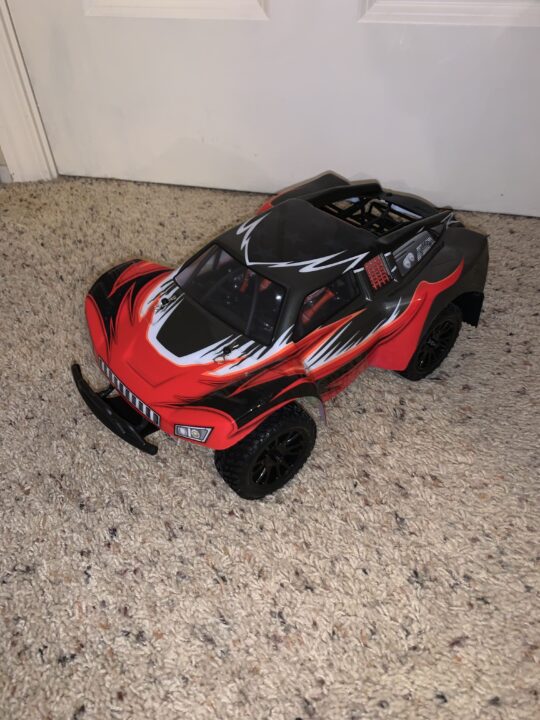
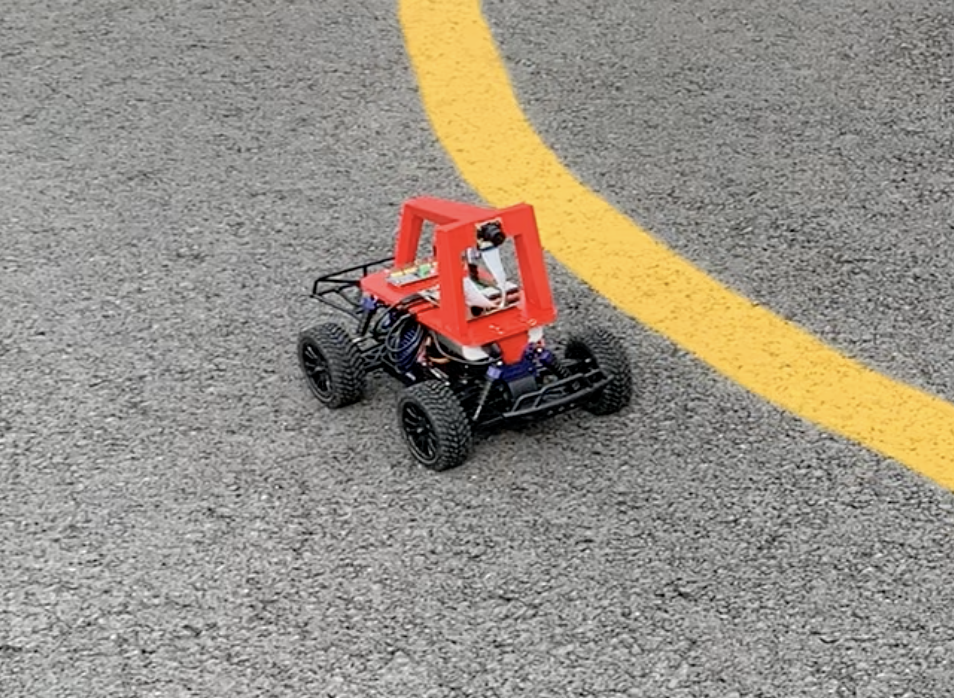
I purchased a remote controlled car online.
The car pictured here is the Exceed Racing Desert Short Course Truck 1/16 Scale.
This is a standard build car that is plug and play.
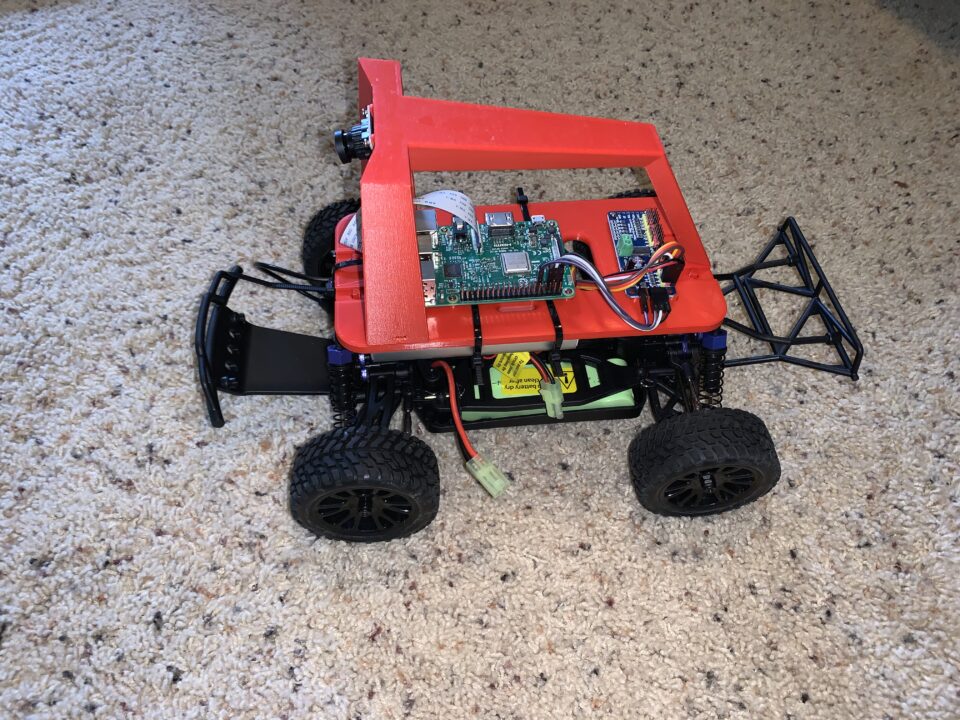
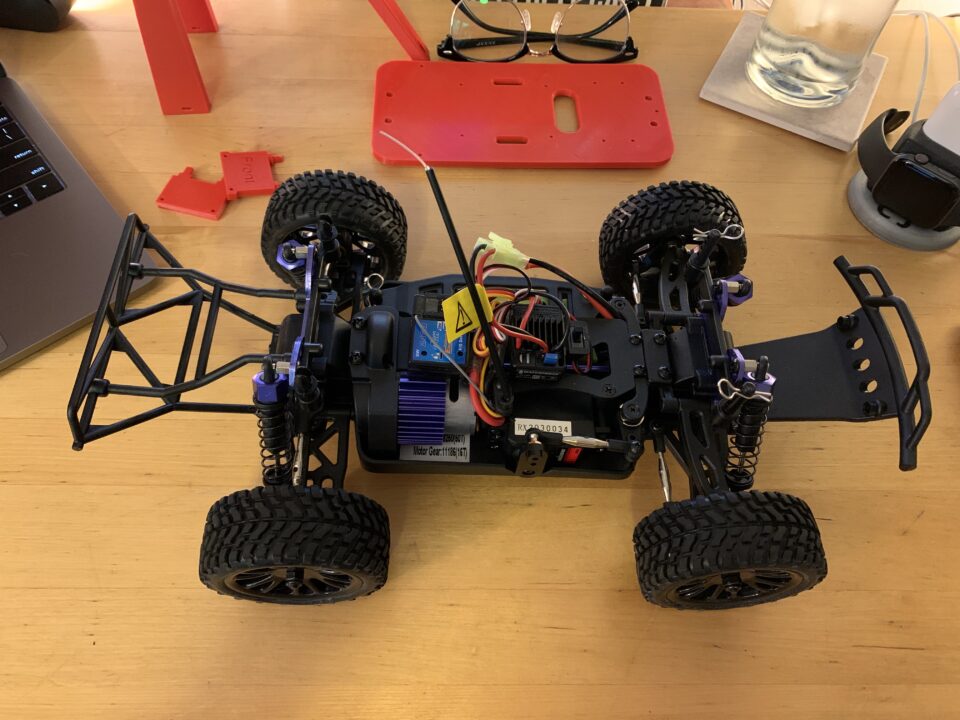
I removed the cover of the car and connected the 3D printed car chasis showed below.
Hardware Assembly
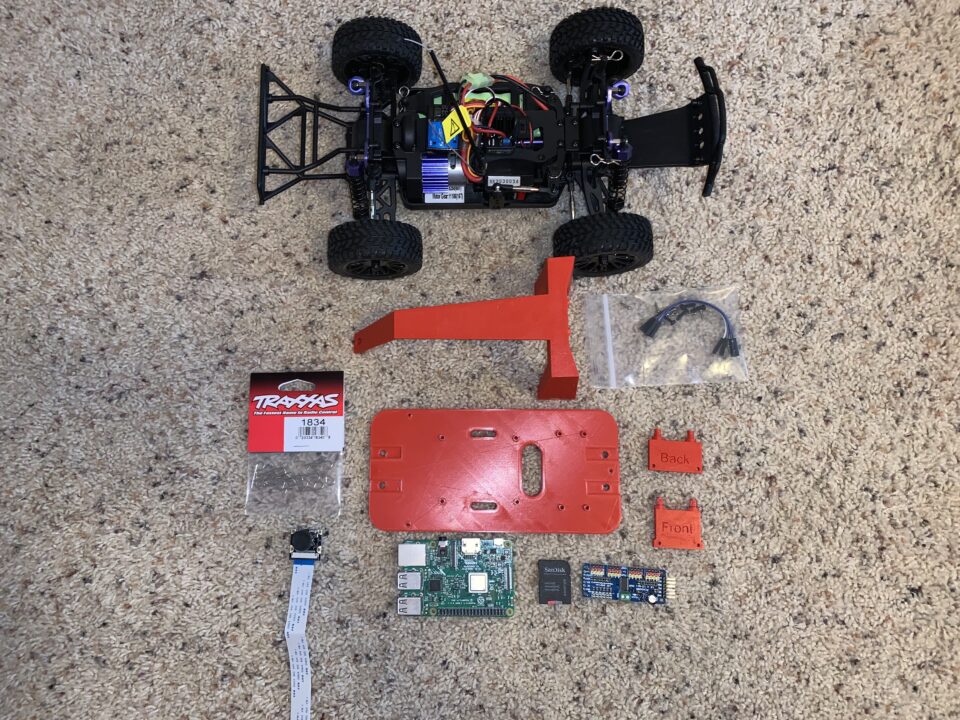
HARDWARE LIST
RC Car: Exceed Racing Desert Short Course Truck 1/16 scale
Raspberry Pi 3 Model B+
portable charger
64GB MicroSD Card
Sombrero hat
Camera
Step 1: 3D Print Parts. I was able to find the design on Thingiverse and I 3D printed the parts in red PLA. These parts will create the roll cage that will prevent damage as well as hold the camera to take video input.
Step 2: Connect servo shield to Raspberry Pi. The servo is able to take inputs including the images, steering angles, and throttles and send that information to the Raspberry Pi.
Step 3: Attached Raspberry Pi to 3d printed bottom plate. I was able to screw the hardware onto the base plate and attach the portable charger on the bottom of the base plate.
Step 4: Attach camera. Slipped the camera into the 3D printed part with cable end first. This camera collects images while the car drives and will be able to train the neural networks based on my driving habits.
Step 5: Put all pieces together on car. The 3D printed pieces were put together using pins.
Software Installation
Once the car was fully built I was able to install necessary components on my host PC.
I used windows operating system and created a Python anaconda environment.
I used a 64 GB SD card so that I had plenty of room for the software download as well as collecting the data.
I installed VNC (Virtual Network Computing) on the Raspberry Pi so I could remotely control the Raspberry Pi from my computer.
I tested the RC Car outside and connected it to a hotspot from my phone.
I found the IP address of the Raspberry Pi so I could use SSH to access the car.
I was able to calibrate the car to make sure the throttle and steering was responsive to my computer inputs.
I was able to start collecting data now that the hardware was put together, the necessary software was installed, and the car was calibrated.
Driving with web controller and collecting data
I can control my car from a web browser.
I can record images, steering angles, and throttle values.
To make sure I collected good data I followed these steps:
1. Practiced driving around the track a couple times.
2. When I was confident I can drive 10 laps without mistake, restart the python mange.py process to create a new tub session. Press Start Recording using the web controller.
3. If I crash or run off the track press Stop Car immediately to stop recording.
4. After I’ve collected 10-20 laps of good data (5-20k images) I stopped my car with Ctrl-c in the ssh session for my car.
5. The data I’ve collected is in the data folder in the most recent tub folder.
I transferred the data to my PC to train.
I ran the training script on the latest tub by passing the path to that tub as an argument.
After the model was trained on the data, I moved the model back to the Raspberry Pi, so I can use it for testing it if it will drive itself.

Self Driving
After I have collected data and trained the car it was time to I placed the car on the track so that it is ready to drive.
I ran a few short scripts and now I start my car again and pass it my model to drive.
The car will now drive on it’s own!
Key Takeaways
I have always been fascinated with self driving cars.
I took on this small scale model as a side project to teach myself how self driving vehicles operate using Machine Learning and the integration of different hardware components and my software.
The open source content provided easy access to the code and I was able to join a community that had a shared interest with me.